24 November 2014

Thattai/Pappu Billa (Crispy Snack)

The thattai is an all-time favorite snack for all of us, especially my daughter, who is really fond of having them with the small onion thokku/pickle.  It has its place for sure in the diwali bakshanam and of course done any time of the year.  My mother-in-law taught me the techniques of doing this.  Indeed, we get a lot to learn from our elders and my mom-in-law is a cookaholic and loves cooking any time.  She makes these traditional snacks and her speciality is that they are not at all oily and have a longer shelf life (of course, nothing would be left long).


Ingredients:

Roasted Rice Flour - 4 cups

Roasted Gram (Pottukadalai/Pori Kadalai) Flour - 1 cup
  
Butter - 1 tbsp

Salt - As needed

Asafoetida powder (Perungayam) - 1/4 tsp

Cumin Seeds (Jeeragam) - 1/2 tsp

Black Pepper - 1/2 tsp

Bengal Gram Dhal (Channa Dhal/Kadalai Paruppu) - 1 tsp

Green Gram Dhal (Moong Dhal/Paasi Paruppu/Payatham Paruppu) - 1 tsp

White Til (Ellu) - 1 tsp


Method:

1.  Soak the dhals in water for 30 minutes.  Then, drain the excess water and keep aside.

2.  Dry roast cumin and black pepper.  Cool and grind to a coarse powder.

3.  In a mixing bowl, add the dry roasted rice flour, roasted gram flour, salt, asafoetida, butter, cumin and black pepper powder, soaked bengal gram and green gram dhals, til and mix well until combined.


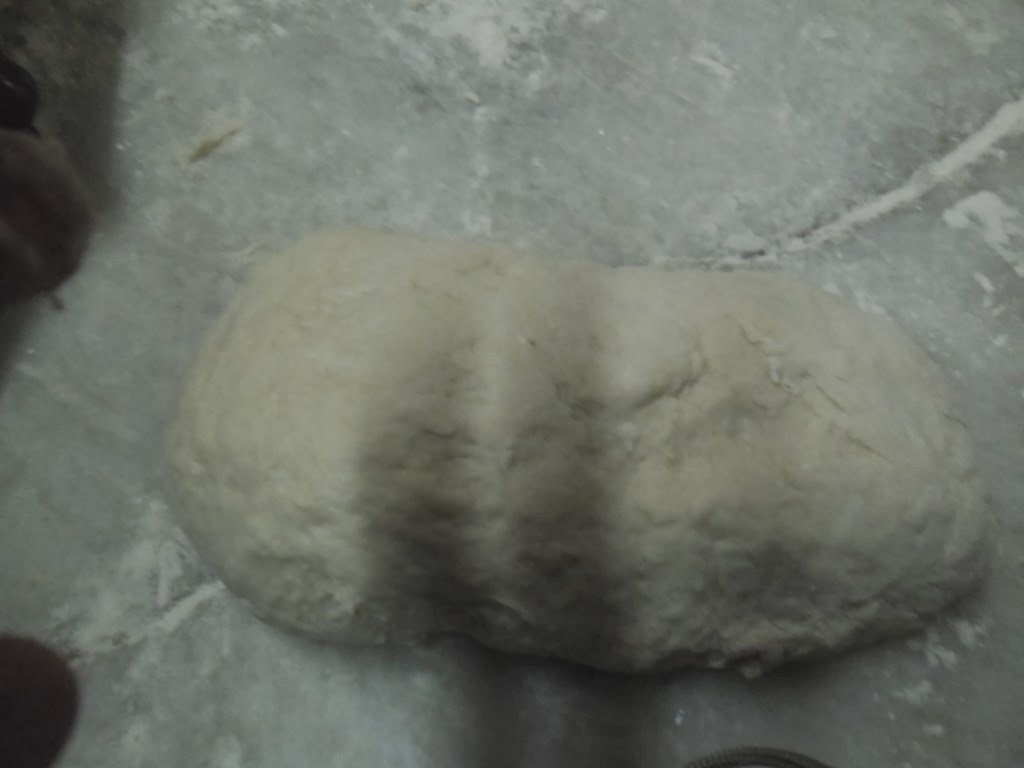
4.  Add water little by little and make a smooth and slightly stiff dough.  Keep this dough covered with moist cloth.


5.  Make even sized balls of gooseberry size and keep covered until use.


6.  Place the balls (a few at a time) on a clean towel and place a greased plastic sheet over the balls and press them with a flat based bowl or plate.


  7.  Leave them on the towel for about 5 to 10 minutes so that the extra moisture is absorbed.  Do not leave beyond 10 minutes.

8.  Heat oil in a heavy bottomed kadai.  Check the oil temperature by dropping a small piece of dough in the oil; if it rises immediately to the surface, the oil is ready for frying of the thattais.  Keep in medium flame.

9.  Using a ladle, remove them from towel and deep fry in hot oil a few at a time  until crisp and golden brown.


10.  Remove, drain excess oil in a colander or on paper towel/tissue.


11.  Repeat the same process for the rest of the dough.

12.  After it cools, store in airtight container.

The thattais are crispy and less oily and stay good for at least a week to 10 days if stored properly.


Notes:

After pressing the dough, you can prick with a fork here and there to avoid puffing up.

The thinner you press, the crispier they are but do not press so thin that they would not come out of the towel.

I did the easier and shortcut method of pressing the thattais. They can be pressed with your fingers one by one too on a plastic cover.

Coarsely crushed roasted peanuts can also be added to the dough.


9 November 2014

Mini Quiche

The Mini Quiche is a savory egg custard with fillings of your choice according to availability of ingredients and mood.  This mini quiche serves best for breakfast, brunch, or anytime snack.  An easy to assemble and bake dish that you can sure give a try.

I tried making this mini quiche being a part of a group named Fondbites, Bake Along, through which we bake as per their weekly updates.  This helps me learn as well as explore into the baking world by far.

Mini Quiche is also called the frittata, and in this version, I have filled in with sauteed spring onions, capsicum, mushrooms, and garnished with cheese and coriander leaves.  The original version as per the group called for spinach to be added to the sauteed veggies but I couldn't find it at the nearest store and so have not used it but have added finely chopped coriander leaves.

Ingredients

Eggs - 4

Mushrooms (chopped) - 1 cup

Capsicum - 1 (chopped)

Spring Onions - 4 or 5 stalks

Grated Cheese - 3 tbsp

Coriander Leaves (chopped) - 2 to 3 tbsp

Crushed Black Pepper - 2 tbsp for the veggies and 1 tbsp for the eggs

Salt - To taste

Olive oil - 1 tbsp plus for greasing


Method


1. Chop vegetables and keep aside.

2.  In a kadai, add olive oil.  When hot, add the spring onions and saute for 1 minute.

3.  Now add chopped mushrooms and saute until half cooked and water starts releasing out.

4.  Then, add chopped capsicum and saute.

5.  Sprinkle pepper powder and salt and mix and switch off the flame.  The vegetables should be cooked only to 3/4th consistency and not cooked fully.  The vegetable filling is ready now.  Keep aside.

6.  In a bowl, add eggs, pepper, and salt and whisk until combined.

7.  Grease the silicon muffin moulds with oil and then fill the egg mixture to half level.

8.  Next, add the sauteed vegetables over the egg mixture until the muffin liner is full.

9.  Crown the filled muffin cups with grated cheese and chopped coriander leaves.

10.  Bake in a preheated oven at 200 degree centigrade for 20 - 25 minutes until a toothpick inserted in the middle comes out clean.

11.  Remove from oven, allow to cool slightly, and serve.

Delicious Mini Quiche is ready.  These are good to serve for breakfast, brunch, or as a school snack.  A healthy, gluten-free, low-carbohydrate dish to relish.

It was stomach filling and lip smacking.


Notes

I used the button mushrooms.  You can add in any edible mushroom available for you.

As I could get only the regular green capsicum/bell pepper, I have used it.  To add in color, you can also use the red bell pepper or the yellow ones.

Use both the green and white portions of the spring onions.  You can saute the white portion first and then add in the green portion at the end of sauteing.

Any type of cheese, viz., pizza/mozzarella cheese, cheddar cheese or even the cheese cubes can be used.

Use salt cautiously as cheese would contain some salt.

If you are using spinach, wash and chop a bunch of spinach and add after the capsicum is sauteed and fry for a few minutes.  This would make the quiche a healthier dish.

If silicon muffin moulds are not available, you can use paper liners too placed in metal muffin tray but make sure they are greased well with oil.

Sunflower oil can also be used instead of olive oil.

17 July 2014

Microwave Chocolate Cake (No butter cake)

The Microwave Chocolate Cake is a yummilicous dessert which any chocolate lover would like to have.  It is a moist cake and almost like a brownie.  This recipe was introduced to me by a friend Mrs. Viji Ravikumar here in a club activity.  The demo she made at home made me anxious to try at home.  I was not much fond to have a chocolate cake or to say anything of a chocolate flavor like milkshakes or icecreams till then.  But the taste of this cake in the first bite itself made me change the idea and now it has been umpteen times that I have done this cake at home.  It is an all-time favorite for my daughter and of course whoever has it.

Ingredients:

Maida - 1-3/4 cup

Powdered Sugar - 2 cups

Cocoa powder - 1/4 cup

Vegetable Oil - 1 cup

Eggs - 2

Water - 1 cup

Instant Coffee Powder - 1 tsp

Vanilla Essence - 2 tsp

Baking Powder - 1 tsp

Salt - a pinch


Method:

1.  Sieve together well maida, salt, powdered sugar, baking powder, and cocoa powder for at least 3 times.  Keep aside.

2.  Boil water and add instant coffee powder and bring to boil to make a dicoction.  Allow to cool.

3.  Beat eggs and vanilla essence together until light and fluffy.

4.  Pour oil into the beaten eggs in a stream and beat well till creamy.  Keep aside.

5.  In the sieved maida mix, add the beaten eggs and oil and mix well with the spatula or a hand mixer at a low speed.

6.  Blend in the coffee dicoction little by little until the cake mixture is of ribbon consistency when poured with the spatula.  Fold in one direction only.

7.  Grease with butter or oil the cake mold (microwave safe) and dust with flour on all sides.

8.  Pour in the cake batter into the mold and tap lightly to form an even surface.

9.  Sprinkle finely chopped cashews and kismis over the batter.  This is optional.

9.  Bake in microwave mode for 9 minutes with a standing time of 5 minutes.

10.  Cool well for at least 1 to 2 hours and then use.


Notes:

This cake is a moist cake and a no butter version.

The same can be baked in an OTG.  For this method, preheat the oven at 180 degrees for 10 minutes.  Then, place the cake mold with the batter and bake for 30 to 35 minutes or until a toothpick pricked in the center comes out clean.   It is better to check at 25 minutes but do not open the oven prior to that time.

The same batter can be used to make chocolate cupcakes.  The preheating time is the same of 10 minutes and the baking time would be 10 to 12 minutes at 180 degrees.

The entire coffee dicoction may not be used up.  Check for the consistency of the batter when 3/4th of the dicoction is used up and then add in more if necessary.  If the dicoction is not enough, add in a teaspoon of milk to bring the batter to the ribbon consistency.

Either olive oil or an odorless vegetable oil can be used for this recipe.  I used sunflower oil.

Maida can be substituted entirely or half and half with wheat flour.  Since wheat flour is denser than maida, the cake also would be denser and a bit hard than the maida version.

Happy Baking!!!


16 July 2014

Schezwan Ladies Finger

Ingredients:

Ladies Finger - 1/2 kg

Spring Onions - 3

Sugar - 1 tbsp

White Til (optional) - For garnishing

Schezwan Sauce (as prepared in previous recipe)

Oil - As needed to deep fry 


Method:

1.  Wash and cut ladies finger to 1 inch pieces.

2.  Chop finely the spring onions.

3.  Heat a kadai and deep fry the ladies finger pieces in hot oil until it is crisp but does not change its green color.  Keep aside.

4.  In another pan, heat a tablespoon of oil, add spring onions and saute for a minute.

5.  Add 3 to 4 tablespoons of the homemade schezwan sauce and fry a bit.

6.  Add the deep fried ladies finger pieces and toss well until the sauce coats the vegetable pieces.

7.  Serve hot garnished with white til.

This is a dry curry and is a lip smacking variety of ladies finger which is a vegetable rich in nutrients.  I am sure this is a favorite for kids and for the grown ups too.  This suits best for fried rice and parathas.  This can be had as a snack too.


Note:

Add a teaspoon of cornflour diluted in water just before tossing the ladies finger pieces to get a good shine and thickness for the gravy/sauce.


5 April 2014

Homemade Schezwan Sauce

I gave an immediate try of this recipe as soon as I came across it on TV as it seemed to be really interesting and lip smacking.  Mrs. Susheela gives a lot of these interesting recipes on the Podhigai channel and a lot of nutritive information too.  Simply like to watch her shows.


Ingredients:

Garlic - 10 flakes

Ginger - 1 tbsp

Red Chillies - 10 to 12

Chopped Garlic - 3 tbsp

Tomato - 2 (if using tomato puree, use 1/2 cup of the puree)

Spring Onions - 2 tbsp (use the onion portion only)

Tomato Sauce - 1 tbsp

Soya Sauce - 1 tbsp

Vinegar - 1 tbsp

Pepper Powder - 1/2 tsp or to taste

Salt - To taste


Method:

1.  Soak red chillies for half an hour in lukewarm water.  Strain and grind to a smooth paste with the 10 garlic flakes.  Keep aside.

2.  Heat oil in a pan.  Add the chopped garlic and fry for a minute.

3.  Add the grated ginger and give a quick stir.

4.  Now, add the finely chopped onion (root) portion of the spring onion and saute till translucent, say for about 2 to 3 minutes.

5.  Quickly stir in the red chilli and garlic paste and mix well.

6.  Add the finely chopped tomatoes or the tomato puree and stir well.

7.  Add the sauces, viz., tomato sauce, soya sauce, and finally the vinegar.

8.  When it starts to bubble, sprinkle the salt and the pepper powder and bring to boil.  

The Homemade Schezwan Sauce is ready now.  No water is needed to be added.  It is thick in consistency.  Store in an airtight container, use a dry spoon, and can be used in any Chinese gravies or curries.  This can be used as such too as an accompaniment to fried rice, rotis, or even idlis and dosas for those who love the indo-chinese fusion style of food.

If you mix this sauce with plain rice and give a quick stir and a dash of quick stirred veggies, this makes a quick and easy lunch box recipe of Schezwan fried rice for school/office goers.  Please do give a try.

I used this sauce to make the Schezwan Ladies Finger, a dry curry, that was so yummy that we couldn't resist finishing it up in a split second, rather grabbing and gobbling them up.


Note:

The sauces (tomato sauce and soya sauce) contain salt already, so adjust the salt for this recipe accordingly. 

21 March 2014

Oats Masala Milk Delight

This oats masala milk delight was really tasty and energetic and rightly served the purpose of preparing it for my daughter who was getting ready for her exams.  It was easy, simple, and quick to make.  Surely, it is one of the best energy drinks for students.

Ingredients:

Milk - 2 cups

Saffron - A pinch

Oats - 4 tbsp

Cardamom powder - 1/4 tsp

Honey/Sugar - 2 tsp

Dry fruits/nuts (eg: cashew, badam, pista, walnut, raisins, dates, figs) - 2 tsp


Method:

Boil milk with saffron.  To this, add oats and boil for 2 to 3 minutes.  Add cardamom powder and honey/sugar.  Finely chop the nuts or coarsely powder them and add to the above mixture and bring to boil.  Serve hot or cold in a tall glass with stirrer.

Note:

I used honey in this drink and it was mildly sweet.  If you are a sweet-toothed person, add more honey or add both honey and sugar.  Use any dry fruits that are available at home.  If any type of dry fruits/nuts mentioned above is not available, it can be left out.  The taste does not differ.


Capsicum Gojju

I have been making this recipe often now, say almost every week or as and when it gets over, since I have seen this on TV and quickly noted it.  It is a good accompaniment for almost anything, viz., idlis, dosas, plain rice, rotis although the original recipe was recommended it to be served with ghee and hot rice.

Ingredients:

Capsicum - 1 (medium sized)

Tomatoes - 2

Garlic - 2 pods

Mustard - 1/4 tsp

Cumin seeds - 1/4 tsp

Asafoetida - 1 pinch

Fenugreek seeds - 1/4 tsp

Curry leaves of 2 twigs

Red chilli powder - 1/2 tsp

Sambhar powder - 1/2 tsp

Coriander powder - 1/2 tsp

Tamarind extract - 1 tsp

Jaggery - 1 tsp

Salt - to taste

Oil - 1 tbsp


Method:

Heat oil in a kadai and splutter mustard, cumin seeds, and fenugreek seeds along with asafoetida powder and curry leaves.  Add finely chopped garlic and saute for a minute.  Now add finely chopped tomatoes and stir well for around 3 to 4 minutes until they become soft.  Add in chopped capsicum and mix well.  Add red chilli powder, coriander powder, sambhar powder, and salt one by one and mix well.  Pour in around half a cup of water, mix, and cook with a closed lid.  When cooked 3/4th, add tamarind extract and jaggery and bring to boil.  By this time, the oil floats atop.  Switch off and sprinkle finely cut coriander leaves.  Serve with ghee and hot rice.


19 March 2014

Wheat Carrot Cake (No Butter Cake)

I had been long trying to make this carrot cake as I felt it would be health wise a better option with carrots included in it.  Also, the substitution of wheat flour to maida (at least half the portion of it) made me try this recipe immediately.  It really turned out to be soft and yummy and was over within few hours.
Ingredients:

Maida - 1 cup

Whole Wheat Flour - 1 cup

Raw Carrots (grated) - 2-1/2 cups (340 gms)

Walnuts - 1 cup (100 gms)

Baking soda - 1 tsp

Baking powder - 1-1/2 tsp

Salt - 1/2 tsp

Ground cinnamon - 1-1/2 tsp

Eggs - 4

Sugar - 1-1/2 cups (300 gms)

Vegetable oil - 1 cup (240 ml)

Vanilla extract - 2 tsp


Method:

1.  Preheat oven at 180 degrees for 10 minutes.

2. Toast the walnuts, cool them, and then chop coarsely.

3.  Finely grate carrots.  It can be used as such and it came out fine.  Sauteing is optional but was not needed.

4.  Sieve together maida, wheat flour, baking soda, baking powder, salt, and ground cinnamon and keep aside.

5.  Beat eggs until frothy.  Add sugar (granulated) gradually and beat until the batter is light colored and thick in consistency, say for about 3 to 4 minutes in high stir mode of the beater.  Add oil in a steady stream and then the vanilla extract.  Beat for a minute more.  Add the flour mixture and beat lightly until mixed well.

6.  Now, fold in the grated carrots and the chopped walnuts.

7.  Pour the batter in a cake tin that is already greased with oil/butter and dusted with flour.

8.  Bake in the preheated oven at 180 degrees for 25-30 minutes or until a toothpick inserted in the middle comes out clean.

9.  Remove and cool.


Note:

1.  This cake stays good for 2 days in room temperature.  It can be stored in refrigerator beyond this time.

2. Grated beetroots can also be used instead of the grated carrots but it needs a bit of frying (sauteing) as it has a raw taste coming in when used raw even after baking.

3.  Some chopped walnuts can be saved to garnish the top of the cake.  For this method, sprinkle a handful of coarsely chopped walnuts over the batter after pouring it into the baking tin.  I have mixed the whole of it in the batter itself to get a crunchy bite.

4.  Maida can be skipped and the whole wheat flour can be used entirely for this recipe.


8 March 2014

Homemade Peanut Butter

Peanut Butter is one of the richest sources of essential nutrients to our body.  In India, peanuts (verkadalai/varutha kadalai) is consumed in various forms in its traditional style as kadalai urundai, chikki, peanut rice, etc. etc.  or just plain peanuts, roasted or boiled.  I have not got to taste the commercially made peanut butter in all these years and never plan to henceforth too as my homemade peanut butter filled that gap and it is just yummy and loved very much by my daughter and me too.  With all the ingredients available readily at home any time, it is so easy and simple to make.

Ingredients:

Peanuts (unsalted) - 1-1/2 cups

Salt - a pinch

Sugar - 3/4 tsp

Honey - 2 tsp

Refined sunflower oil/Groundnut oil - 1 tbsp

Method:

First, dry roast and cool the peanuts.  Rub off the skin of the peanuts.  Grind all the ingredients to a smooth paste in a mixer to form the peanut butter.  Transfer this to a clean jar and use a clean spoon every time you spoon it out.  It can be used as spreads on bread slices/chappathis or as soft center fillings in homemade chocolates.  This is a totally preservative free homemade peanut butter.  

Note:

1.  Generally, roasted peanuts are available only as salted.  In that case, avoid the salt as per the ingredient list and add a little more sugar or honey if you are a sweet-toothed person.

2.  The peanut butter can either be a coarse and crunchy paste or a smooth and creamy paste.  It depends on how you like the peanut butter to be.  I made a smooth peanut butter.


13 January 2014

Wheat Rava Kesari

The next day to Vaikunta Ekadasi (i.e. Dwaadasi) needed a sweet to be added to the menu.  Instantly, I thought of making the wheat rava kesari as against the usual white rava kesari.  It just came out really well even on the first try.

Ingredients:

Wheat Rava - !/2 cup

Sugar - 3/4 cup

Milk - 2 to 3 cups

Ghee - 1/2 cup

Cashewnuts and Raisins - 1 tbsp

Elaichi powder - a pinch

Pachai Karpooram - a pinch (optional)

Kesari Color - a few drops

Method:

Heat 1 tsp of ghee in a kadai.  Fry the cashewnuts and raisins to golden brown and keep aside.  In the same ghee, fry the wheat (brown) rava until golden and good smell comes.  Now add in the milk and allow to cook in medium flame until the rava becomes soft for around 5-10 minutes.  This rava takes a bit longer time to cook than the regular white rava.  When cooked, add in the sugar and mix well.  After 2 to 3 minutes, add in the remaining ghee little by little until the mixture does not stick to the wet hands.  Add in the elaichi powder, pachai karpooram, kesari color, the fried nuts and raisins and mix well.  Now, the kesari is ready.  Dot in a extra spoon of ghee to give additional flavor.  This can be either scooped out and had in cups or set in a tray, flattened, and cut into pieces and served with a fried cashewnut on top.

Notes:

I chose to scoop out and serve.  I used milk entirely to make the kesari.  A mixture of water and milk can also be used or just water can be used for the kesari.  The milk gives an additional flavor to the dish but stays good only for 2 days maximum.  Of course, the dish would be finished off by then.  Make sure the rava is fine and not very coarse to give the texture of kesari.


2 January 2014

Bread


This recipe was given to us at the 2 days' Bakery Certificate Course held at the Tamilnadu Agricultural University, Coimbatore.

This recipe is of the standard bread loaf available commonly in our bakeries.

Bread - Ingredients:

Maida - 1 Kg

Sugar - 150 gm

Yeast - 40 gm (or dry yeast 10 gm soaked in 100 mL water)

Water - 500 - 600 mL

Calcium Propionate - 5 gm (optional)

Dalda/Butter - 30 gm

Salt - 20 gm

Method:

1.  Mix all ingredients to a soft, pliable dough.

2.  Knead the dough well at least for 10 mins.

3.  Allow the dough to rest and ferment for 30 minutes.

4.  A standard bread loaf available in bakeries weighs 400 gm.  So, divide the dough into 400 gm quantities.

5.  Shape each piece up and place in the bread loaf mold.  Allow to sit for 30 minutes.

6.  Bake this in a preheated oven for 30 minutes at 220 degrees.

7.  When baked, take it out of the oven, allow to cool at room temperature for 3 hours.

8.  When cool, slice them and pack if necessary.


Notes:

1.  Generally yeast in bakery terms represents the wet yeast that can be directly used.  These are available only in large quantities, say 1/2 kg to start with.  If you are a regular bread maker, it is advisable to get the wet yeast and use directly.  This can be used for other yeast products too such as buns, bread rolls, pizza, etc.  If wet yeast is not available, use dry yeast of 10 gm soaked in lukewarm water for 20 minutes and use the dissolved yeast solution completely for mixing the dough.

2.  While using water, a good maida that contains 12% gluten holds up to 600 mL water.  If water is used to soak yeast, reduce the water directly added to maida to that extent.  For example, if 100 mL is used for soaking yeast, then add 500 mL only for mixing the good maida so making a total of 600 mL in all.

3.  Calcium propionate increases the shelf life of the bread.  It is optional to use in bread making at home.  If calcium propionate is not used, the shelf life of the bread is 2 days in normal temperature or 5 days in the fridge.  If calcium propionate is used, the bread stays good for a minimum of 6 to 7 days.  Calcium propionate avoids mold/fungus formation.  Do not use in excess of the quantity mentioned, else results in throat irritation.

4.  Preheat oven at 180 degrees for 10 minutes and then bake the bread for 30 minutes at 220 degrees.

5.  Bread older than 7 days (if good) can be dried and powdered to be used as bread crumbs in other recipes like cutlets, etc.